Besides the addition of new toys, a lot of work in v16.12 was invested into 'polishing' what was already there. This meant some very visible changes (like the new Modules tab in Nexus and Nexus Ultimate) but mostly a lot of under-the-hood optimizations to performance plus fixes for minor visual glitches and some long outstanding hard-to-diagnose bugs, etc...
Unfortunately so many changes to the code also ended up introducing
a couple of new glitches which were not detected until after the official release.
Personally I would release a new version as soon as a serious bug is fixed, but users generally do not like too many updates in a short period of time. Doing this also makes an application look bad even though the intention is good (i.e.; fix a bug as soon as it is detected).
So, the next version will be mostly a maintenance release to v16.12, but since I had to wait a while anyway, I couldn't resist adding some more toys and polish in the mean time.
So, what's new in the next release, besides the bug fixes to v16.12?
1. Smooth scrolling in the Shelf.
The devil is in the details. It always is. Sometimes it's not the feature itself that makes you go 'Ahhhh' but how much attention to detail was given to it.
The Shelf (tabbed dock) supports multi rows of icons. Up until now scrolling the Shelf meant a new icon row would instantly replace the previous row. Now the icons smoothly scroll up and down (but speeding up to keep up with you if necessary).

I bet not a lot of people noticed (unless, perhaps, if you happen to have more than two active docks), but a similar thing was done in v16.12 to the scrolling in the Docks & Shelves tab in Preferences.
Details.
2. New 'Next Desktop Background' internal command.
Switches to the next wallpaper when Windows is in slideshow mode.
3. New 'Moon Phase' module.
After being on a limbo for a very long time, development of new modules really picked up the pace lately. This is mostly due to
the insane amount of work done from v15.9 onward to 'unify' all the code related to the Winstep modules. It totally paid off, as adding new modules is now both quick and easy.
Or should be.
For this version I wanted to add a new module that was somewhat interesting but at the same time easy and quick to implement. A 'filler', you can say, since more useful modules (such as a disk monitor module) will require further changes to the module engine beneath.
So why not a Moon Phase module? I mean, how hard can THAT be?

Turns out it is actually quite complex if you want to do it right, as I quickly found out.
As most of you have probably noticed by now, I don't like to do half-baked things. My vision for this module involved realistic phase change animations with realistic shadows, accurate viewing angles, etc... For instance, did you know that the moon in the Southern hemisphere appears upside down from the point of view of someone in the Northern hemisphere (and vice versa, of course)? Yes? Ah, but did you know that
the moon wobbles?

This movement is called 'moon libration', by the way.
There were two ways I could go about this: either use pre-rendered frames showing all the phases of the moon, or render the earth shadow myself on top of a static image of the full moon.
Since I wanted realistic animations when you go back and forth in time to find the position and phase of the moon at a specific date, the first method would require at least 59 frames (that's one picture of the moon taken every 12 hours for a whole month/moon cycle). The result is as realistic as it gets, of course, but it has three major drawbacks: first the full animation uses about 1,45 MB, second, time resolution is limited to 12 hours and, finally, the only way for the user to customize the module would be with another animation.
Using a single static image of the full moon solves all those problems:
Customizing the module is now a simple question of supplying an alternate image of a full moon - the application will take care of all the rest. It will even determine/use the correct shadow size for the moon inside the alternate bitmap.
Earth shadow position, angle, etc, can now be shown to the minute (yes, the math formulas are THAT accurate) and, of course, you're using a single 116 KB image instead of a full blown 1.45 MB animation.
The first problem I run to when taking this approach was how to make the earth's shadow using GDI+ (the answer is two overlapping alternate-filled arcs). The second problem was that realistic shadows do not have hard edges - they're heavily blurred.
So I had to implement a Gaussian Blur function based on well known algorithms - and was in for a shock once I finally got it running: blurring the shadow was unbearably slow. As slow as 3-4 frames per second - tops.
So I ended up implementing an alternate - but an order of magnitude faster - box blur algorithm. Much better but still too slow.
Ended up solving this problem by only blurring the alpha channel (that's all you need really) and creating a shadow bitmap that is 2.5 times smaller than the target moon bitmap (this of course makes the shadow even blurrier when you enlarge it to the final size, which, in this case, is actually a good thing).
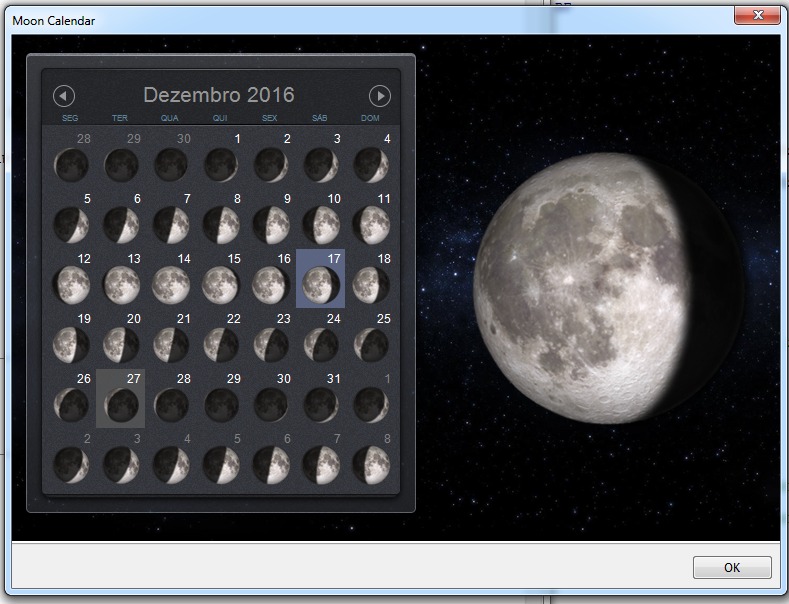
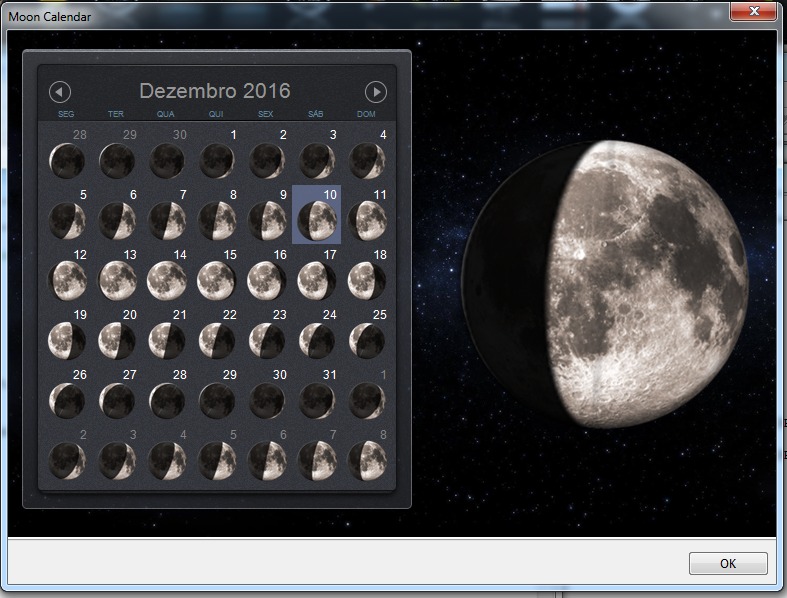
As all other modules, the Moon Phase module has two styles the user can choose from: the simple one on the left, and the realistic one on the right.
You can't see it from the static image above, but in the Modules tab the icons animate by moving the time 4 hours forward with each frame - this way you can see the earth shadow go round the moon.
Unlike the simple moon style, the realistic moon becomes smaller and larger as the moon gets closer to and further away from the earth. It also 'wobbles', just like the real moon. And finally, it is tilted according to where you are on earth (remember, people in the southern hemisphere see the moon upside down to us, but this is not an abrupt change, the tilt of the moon changes gradually as you get closer to the earth's poles - i.e.; it depends on the user's current
latitude coordinate).
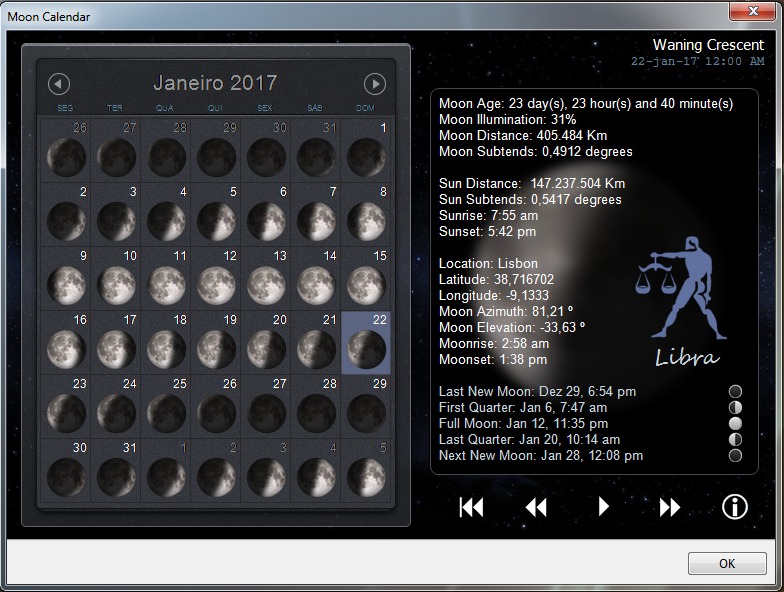
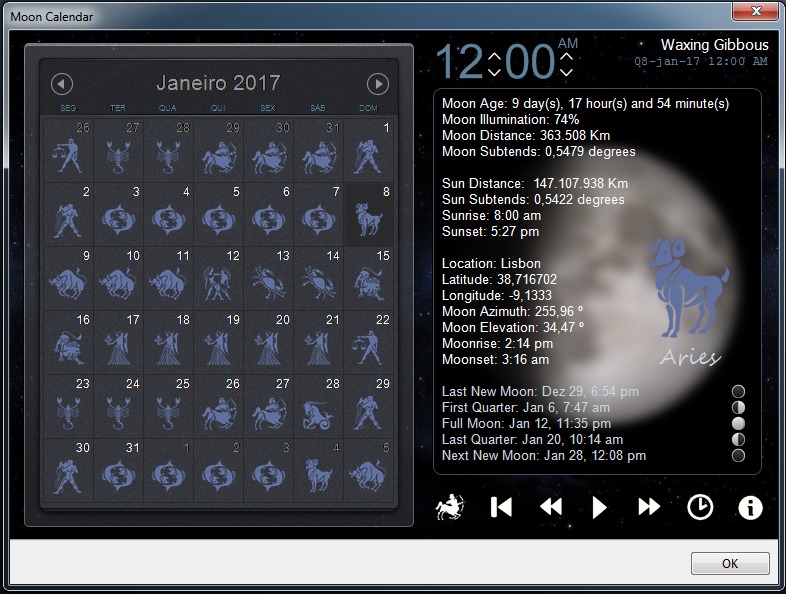
To calculate the tilt we need to know the latitude and longitude coordinates of where the user is (calculating the altitude and azimuth of the moon at a specific time also requires these coordinates). Luckily, the service used for the Weather module's GeoIP location (originally intended to automatically select a city and country for the weather module based on the user's IP address when the application runs for the first time) also gives us this information.